For as long as I can remember I have pressed flowers.
As a child I loved preserving blooms by squashing them between the pages of books, and then later on I bought a little wooden press decorated with birds and blossom. The papery, two-dimensional results lasted for years. I used them to decorate cards and make pictures for relatives. After university when I worked in an office I made pressed flower bookmarks and cards and sold them to my colleagues. For Christmas cards I sprayed pressed leaves with metallic paints and used ferns as stencils. I seem to remember they were quite popular.
I've carried on pressing flowers on and off over the years, and this week decided it was time again to do some more, so I wandered around the garden gathering blooms. It's important to do this on a dry day so that they're completely dry and fully open.
There were some late aquilegias and tiny wild strawberry leaves,
frothy green alchemilla, lilac scabious and dark, dark geranium phaeum,
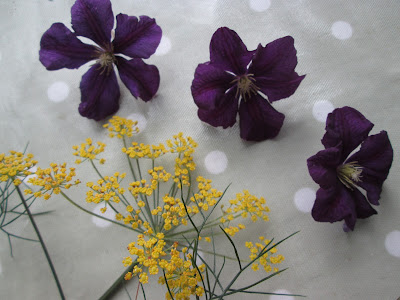
inky-purple clematis and umbelliferous (love that word) bronze fennel.
I started off by making a layer of cardboard and then one of paper. The cardboard must be thick and not corrugated (as this leaves imprinted lines), and the paper must be white and quite absorbent. Blotting paper is perfect. I arranged these tiny pink 'Fairy' roses upside-down with their stalks cut off, allowing plenty of room between each flower.
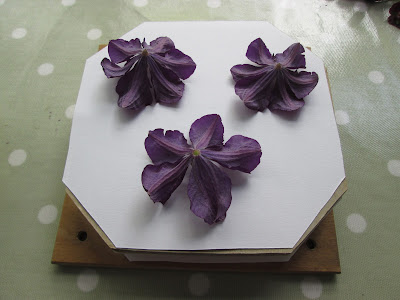
After another layer of paper, cardboard and then paper again I placed the clematis blooms.
More paper, cardboard and paper ... you get the idea. This time the aquilegias on their sides and the geraniums face up. I find that the flowers' shapes will dictate how you place them. The secret is not to have really thick, fleshy plant material as it won't dry easily during the pressing process.
Next layer, scabious heads. The blooms need to be handled gently to avoid damaging them.
Now tiny, neat strawberry leaves.
Alchemilla snipped into little florets.
Umbrellas of fennel, ready to splay out into mini explosions.
Some more closed, placed side-on for a different perspective.
Finally the remaining layers of paper and cardboard piled up on top.
Next came the wooden top with the screws upwards in each corner.
And now time to press down very hard to get the wing nuts on and tightened. If, like me, you've really filled up the press you many wonder if they'll fit, but they will (I have been known to stand on it while I tighten it!). After a couple of days I tighten again, as the flowers will have had time to dry out and lose some bulk. It was now time to leave it for at least two weeks.
Here's a large press my dad made for me years ago when I was making cards to sell. I stencilled it at the time with bluebells.
This book is very inspiring, suggesting lots of imaginative pressed flower projects.
It's full of useful tips and lots of ideas like this plant diary, a page of pressed flowers and leaves for each month of the year.
Some of the designs are quite complicated, like this sumptuous herbal.
And others are more simple, like this pretty little card.
And others are unusual. I have pressed seaweed in the past, and it keeps its shape and colour well.
I like the fact that flower-pressing is a bit of a gamble: you never know how the finished product will turn out. I shall let you know in a couple of weeks!


I sometimes see flower presses in the charity shop, this is something I would love to try, would love to see some of the things you make.
ReplyDeleteWhat a lovely way to spend some time, wandering round the garden snipping here and there for your flower press. I had one as a child and couldn't resist buying one when I saw them again a couple of years ago. Looking forward to seeing the flowers in a few weeks. Hx
ReplyDeleteWe have a very similar flower press from when the girls were younger. We still use it from time to time - usually to press mementos of walks or holidays. I do sometimes struggle with those nuts though! Looking forward to seeing what you make with them. xx
ReplyDeleteI have not pressed flowers for years, I have a couple precious ones Josh gave me, picked from my own garden, but given with so much love. Can't wait to see yours.
ReplyDeleteWow! I can't wait to see the results. I am feeling tempted to have a go. My daughter was given a press for her birthday one year but I think she has taken it with her. Such a genteel hobby. Karen x
ReplyDeleteCathy, this has brought back happy memories for me. I used to press flowers between pages of books and my Mum got into pressing in a big way using flower presses similar to yours and making all sorts of lovely things with the flowers - cards, handbag mirrors, pictures, bookmarks etc. I cannot wait to see what you do with your current batch. xx
ReplyDeleteOh these will look brilliant! Can't wait to see them when they are all pressed and dried up!
ReplyDeleteWhen I was a kid we pressed flowers between books... good memories!
Take care
Anne
Crochet Between Worlds
Oh, wow, this brings back memories. I used to press flowers as a girl, but not as professionally as this, just between the pages of a book. For years, every time you opened a book in our house, dry flowers would drop out. I was an industrious child :-)
ReplyDeleteAmalia
xo
What a lovely thing to do! I hope that these all turn out beautifully for you. I look forward to seeing the finished results! xx
ReplyDeleteOh I used to do this! The results were never particularly pretty though. Sounds like you know more about what you're doing. I look forward to seeing what you come up with.
ReplyDeleteBeautiful! THanks for sharing this with us, it's something I have tried and failed at in the past. A wonderful skill for preserving some special moments :) x
ReplyDeleteLovely blog and photos, looking forward to seeing the end results :)
ReplyDelete